5 simple steps for getting started with Cyanotype printing
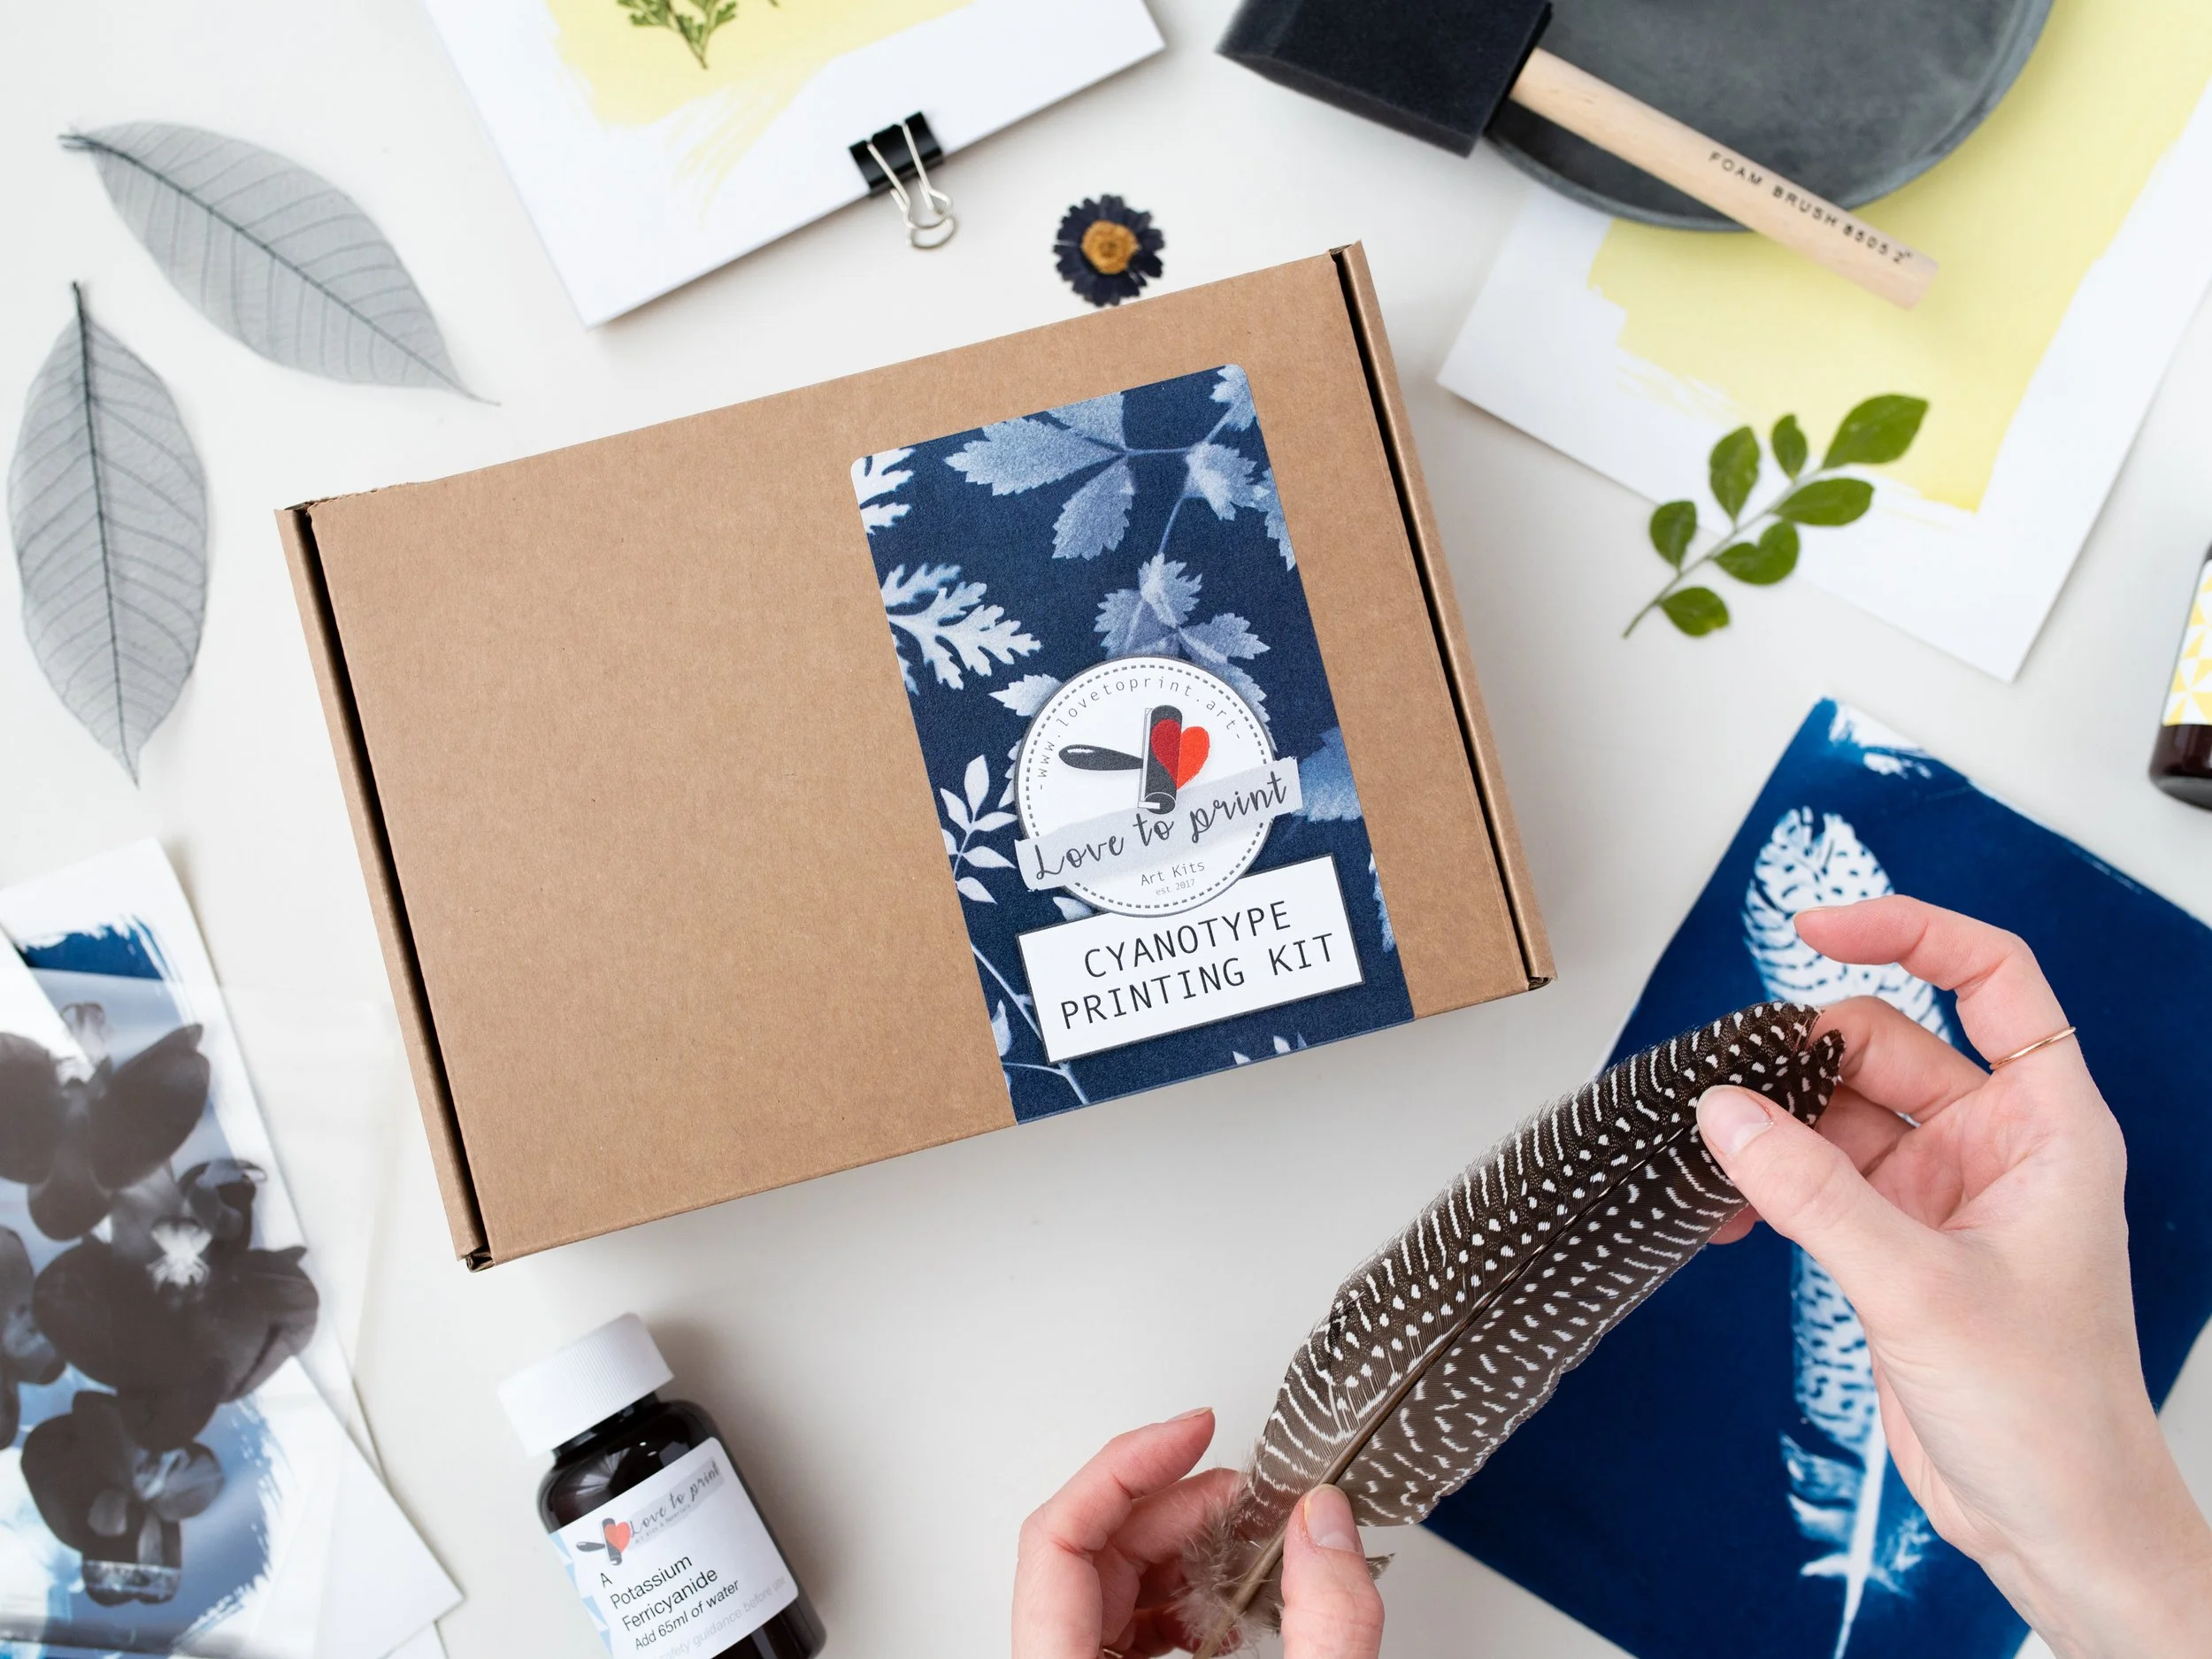


Cyanotype is a photographic printing process that produces a blue print. It is a simple and inexpensive process that was originally used to reproduce architectural plans and drawings. Today, cyanotype is often used as a creative printing process by artists and photographers. In this blog post, I will go over the basic techniques for creating a cyanotype using the Love to print cyanotype kit or Essentials Kit which I sell here or on my etsy shop. Common questions about the kit are covered in my FAQ’s post here. This is a summary of the full instructions which come with the kit and should be read in conjunction with the health and safety advice.
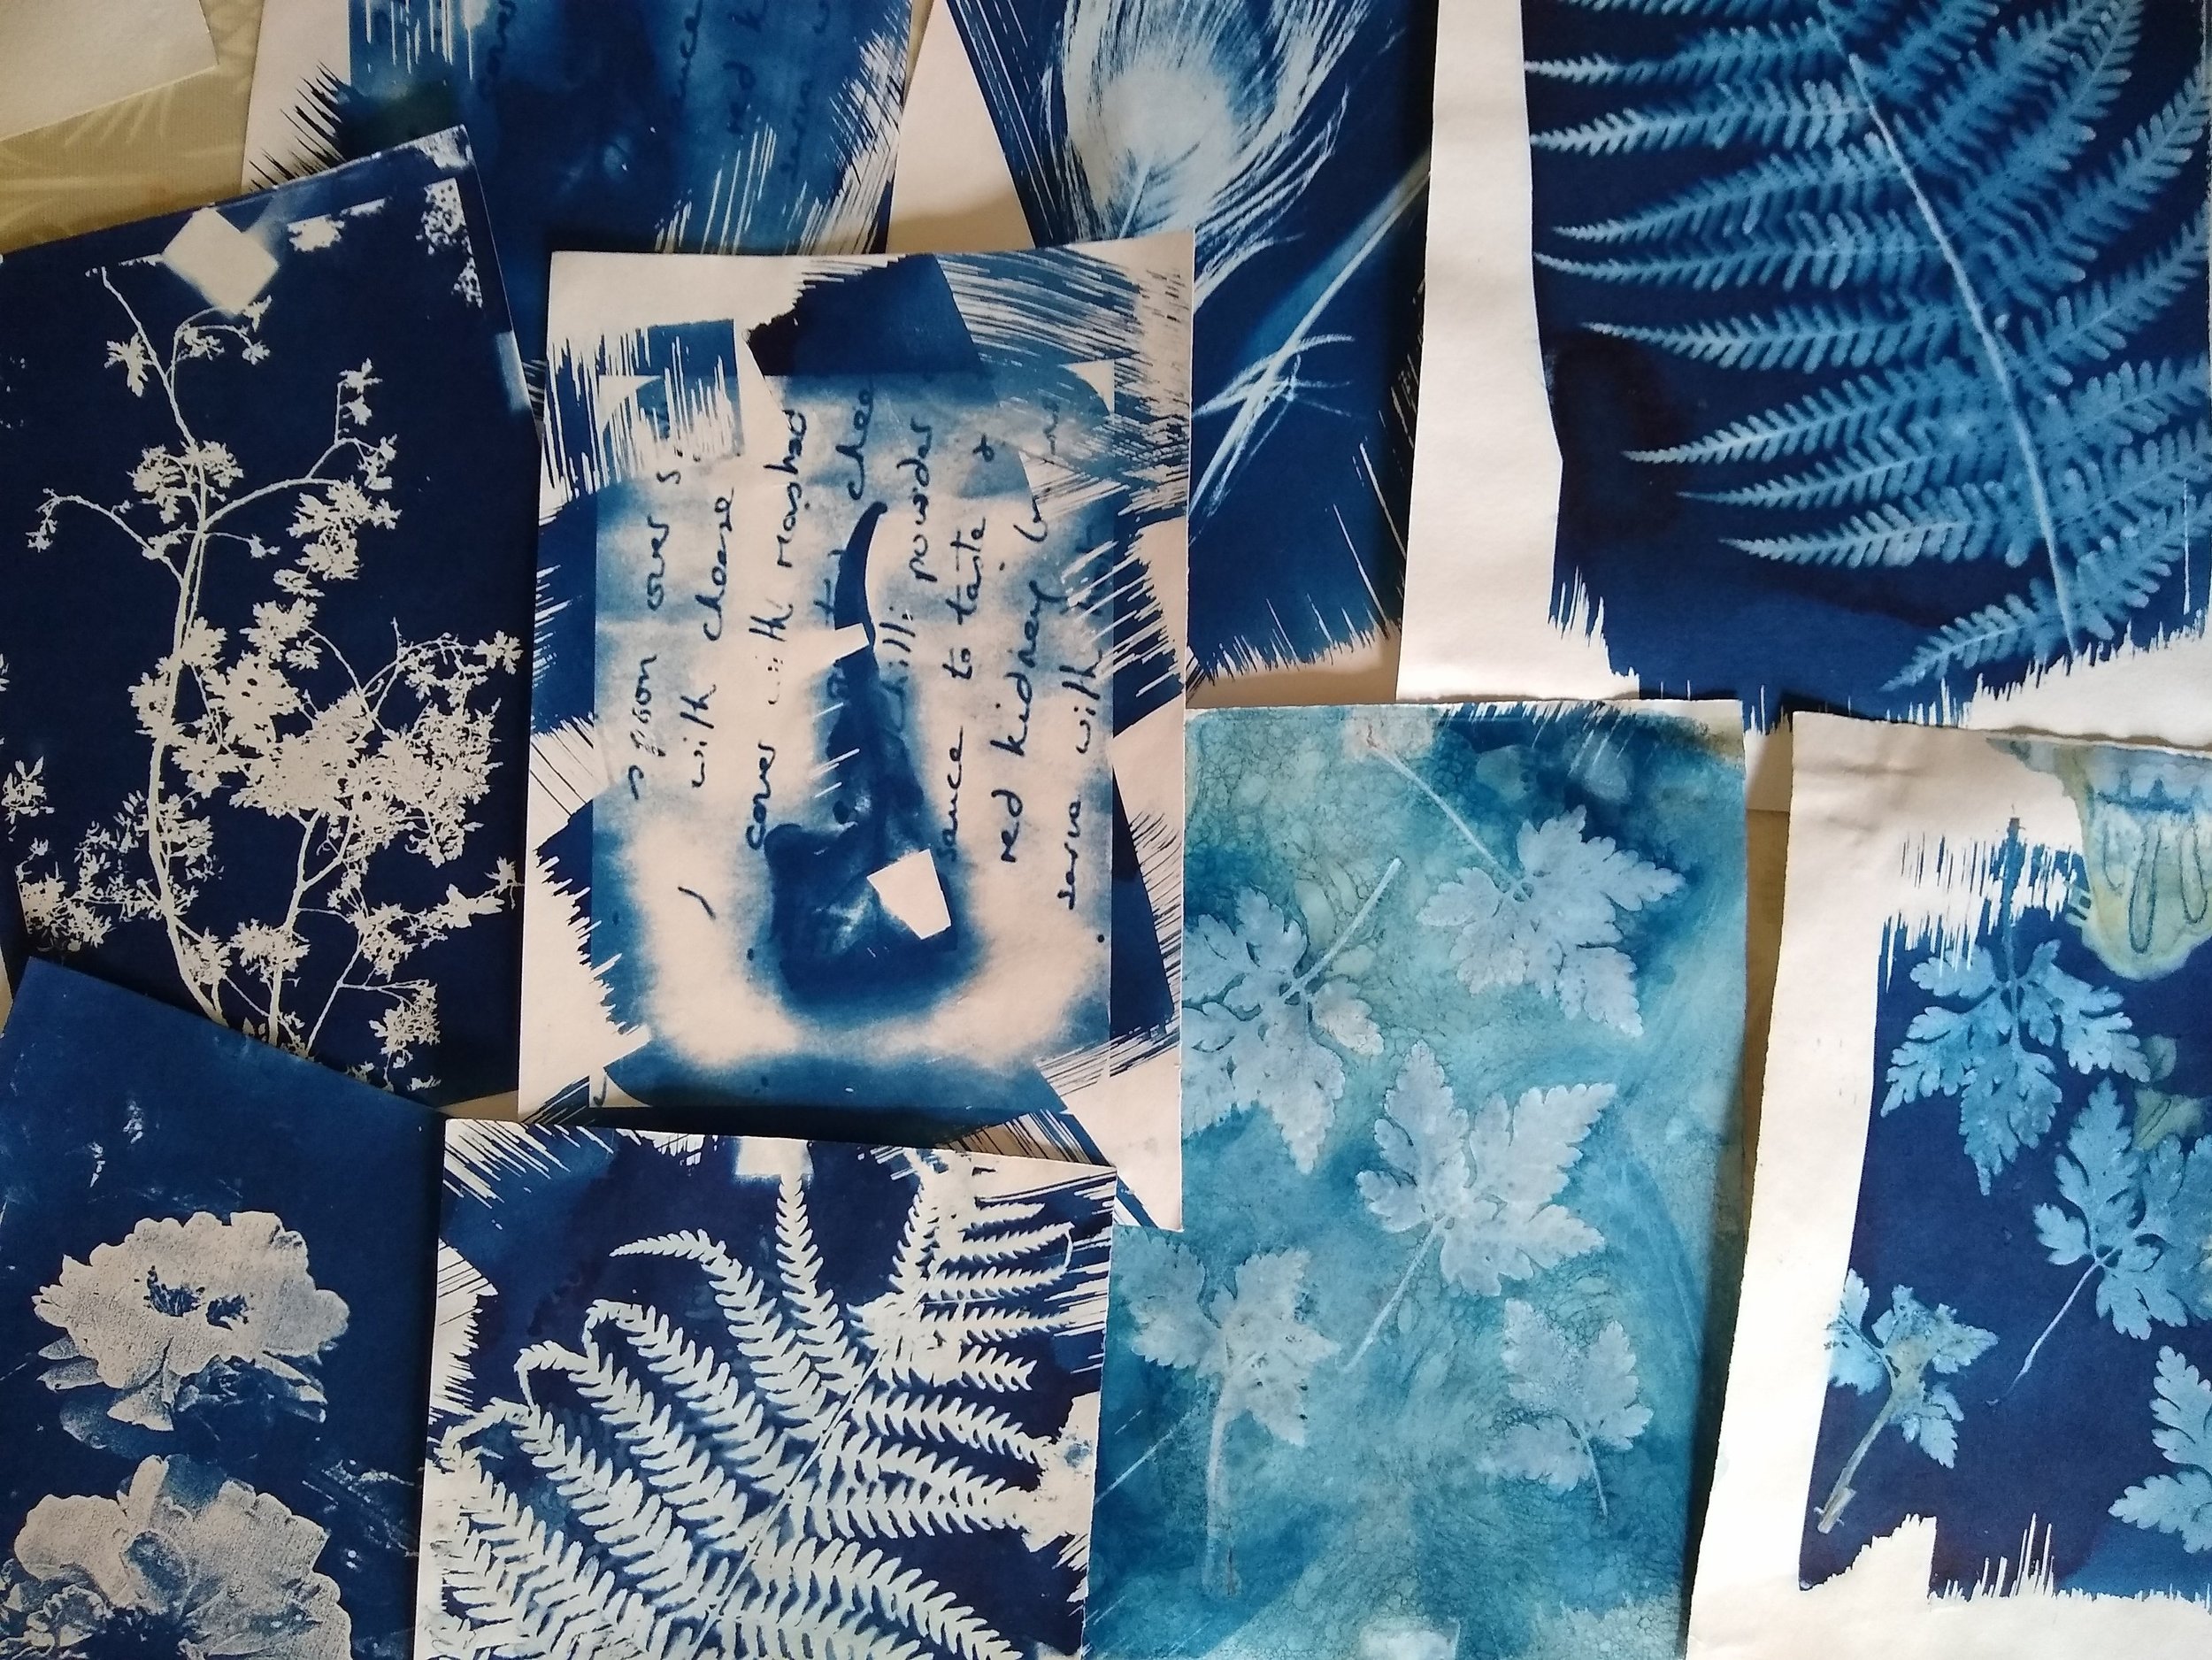
The kits have proved popular since I introduced them during lockdown in the Summer of 2020 and make an ideal gift for creative friends and family who may have an interest in photography and the outdoors. Having said that you don’t need any drawing ability as images are created by gathering and exposing natural objects like leaves and feathers or flat textured items. There are lots of ways you can experiment further once you’ve mastered the basics but I’ll cover those in another post.
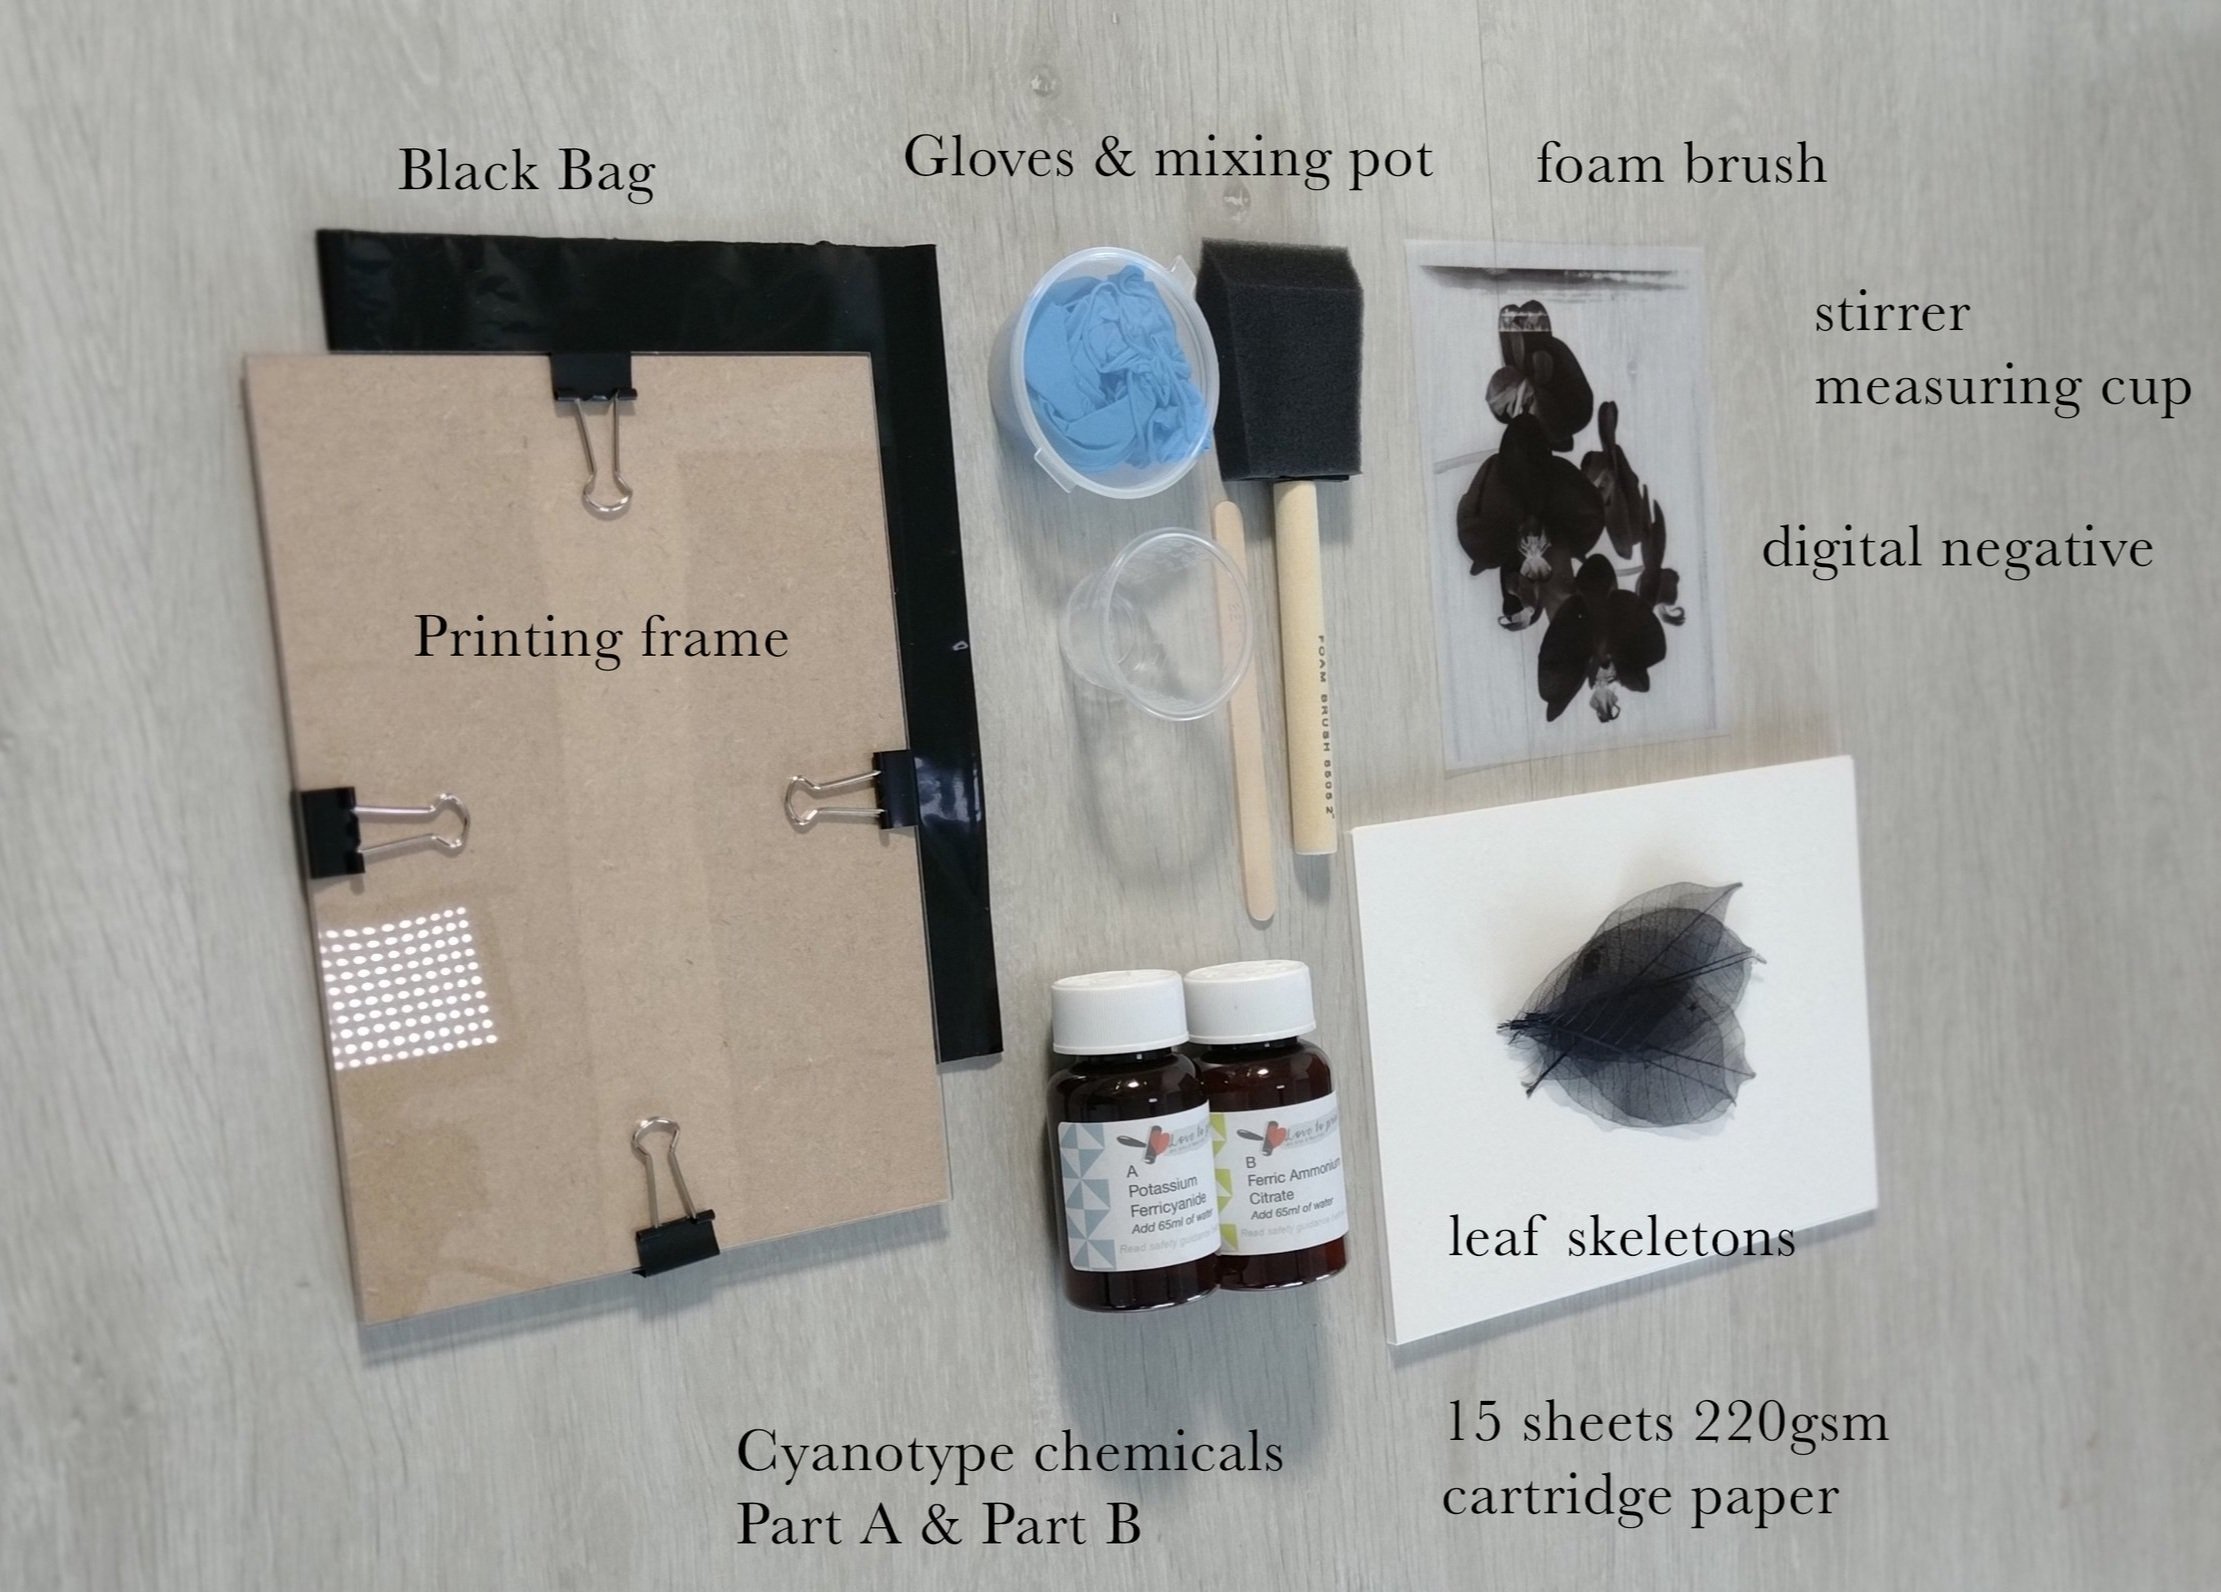
Kit contains:
Chemicals A & B* powder - add 65ml water to make up both solutions*Potassium Ferricyanide & Ferric Ammonium CitratePrinting Frame15 A5 sheets heavyweight cartridge paperDigital negativeLeaf skeletonsBlack bagMixing potmeasuring cupGlovesStirrerInstruction sheet
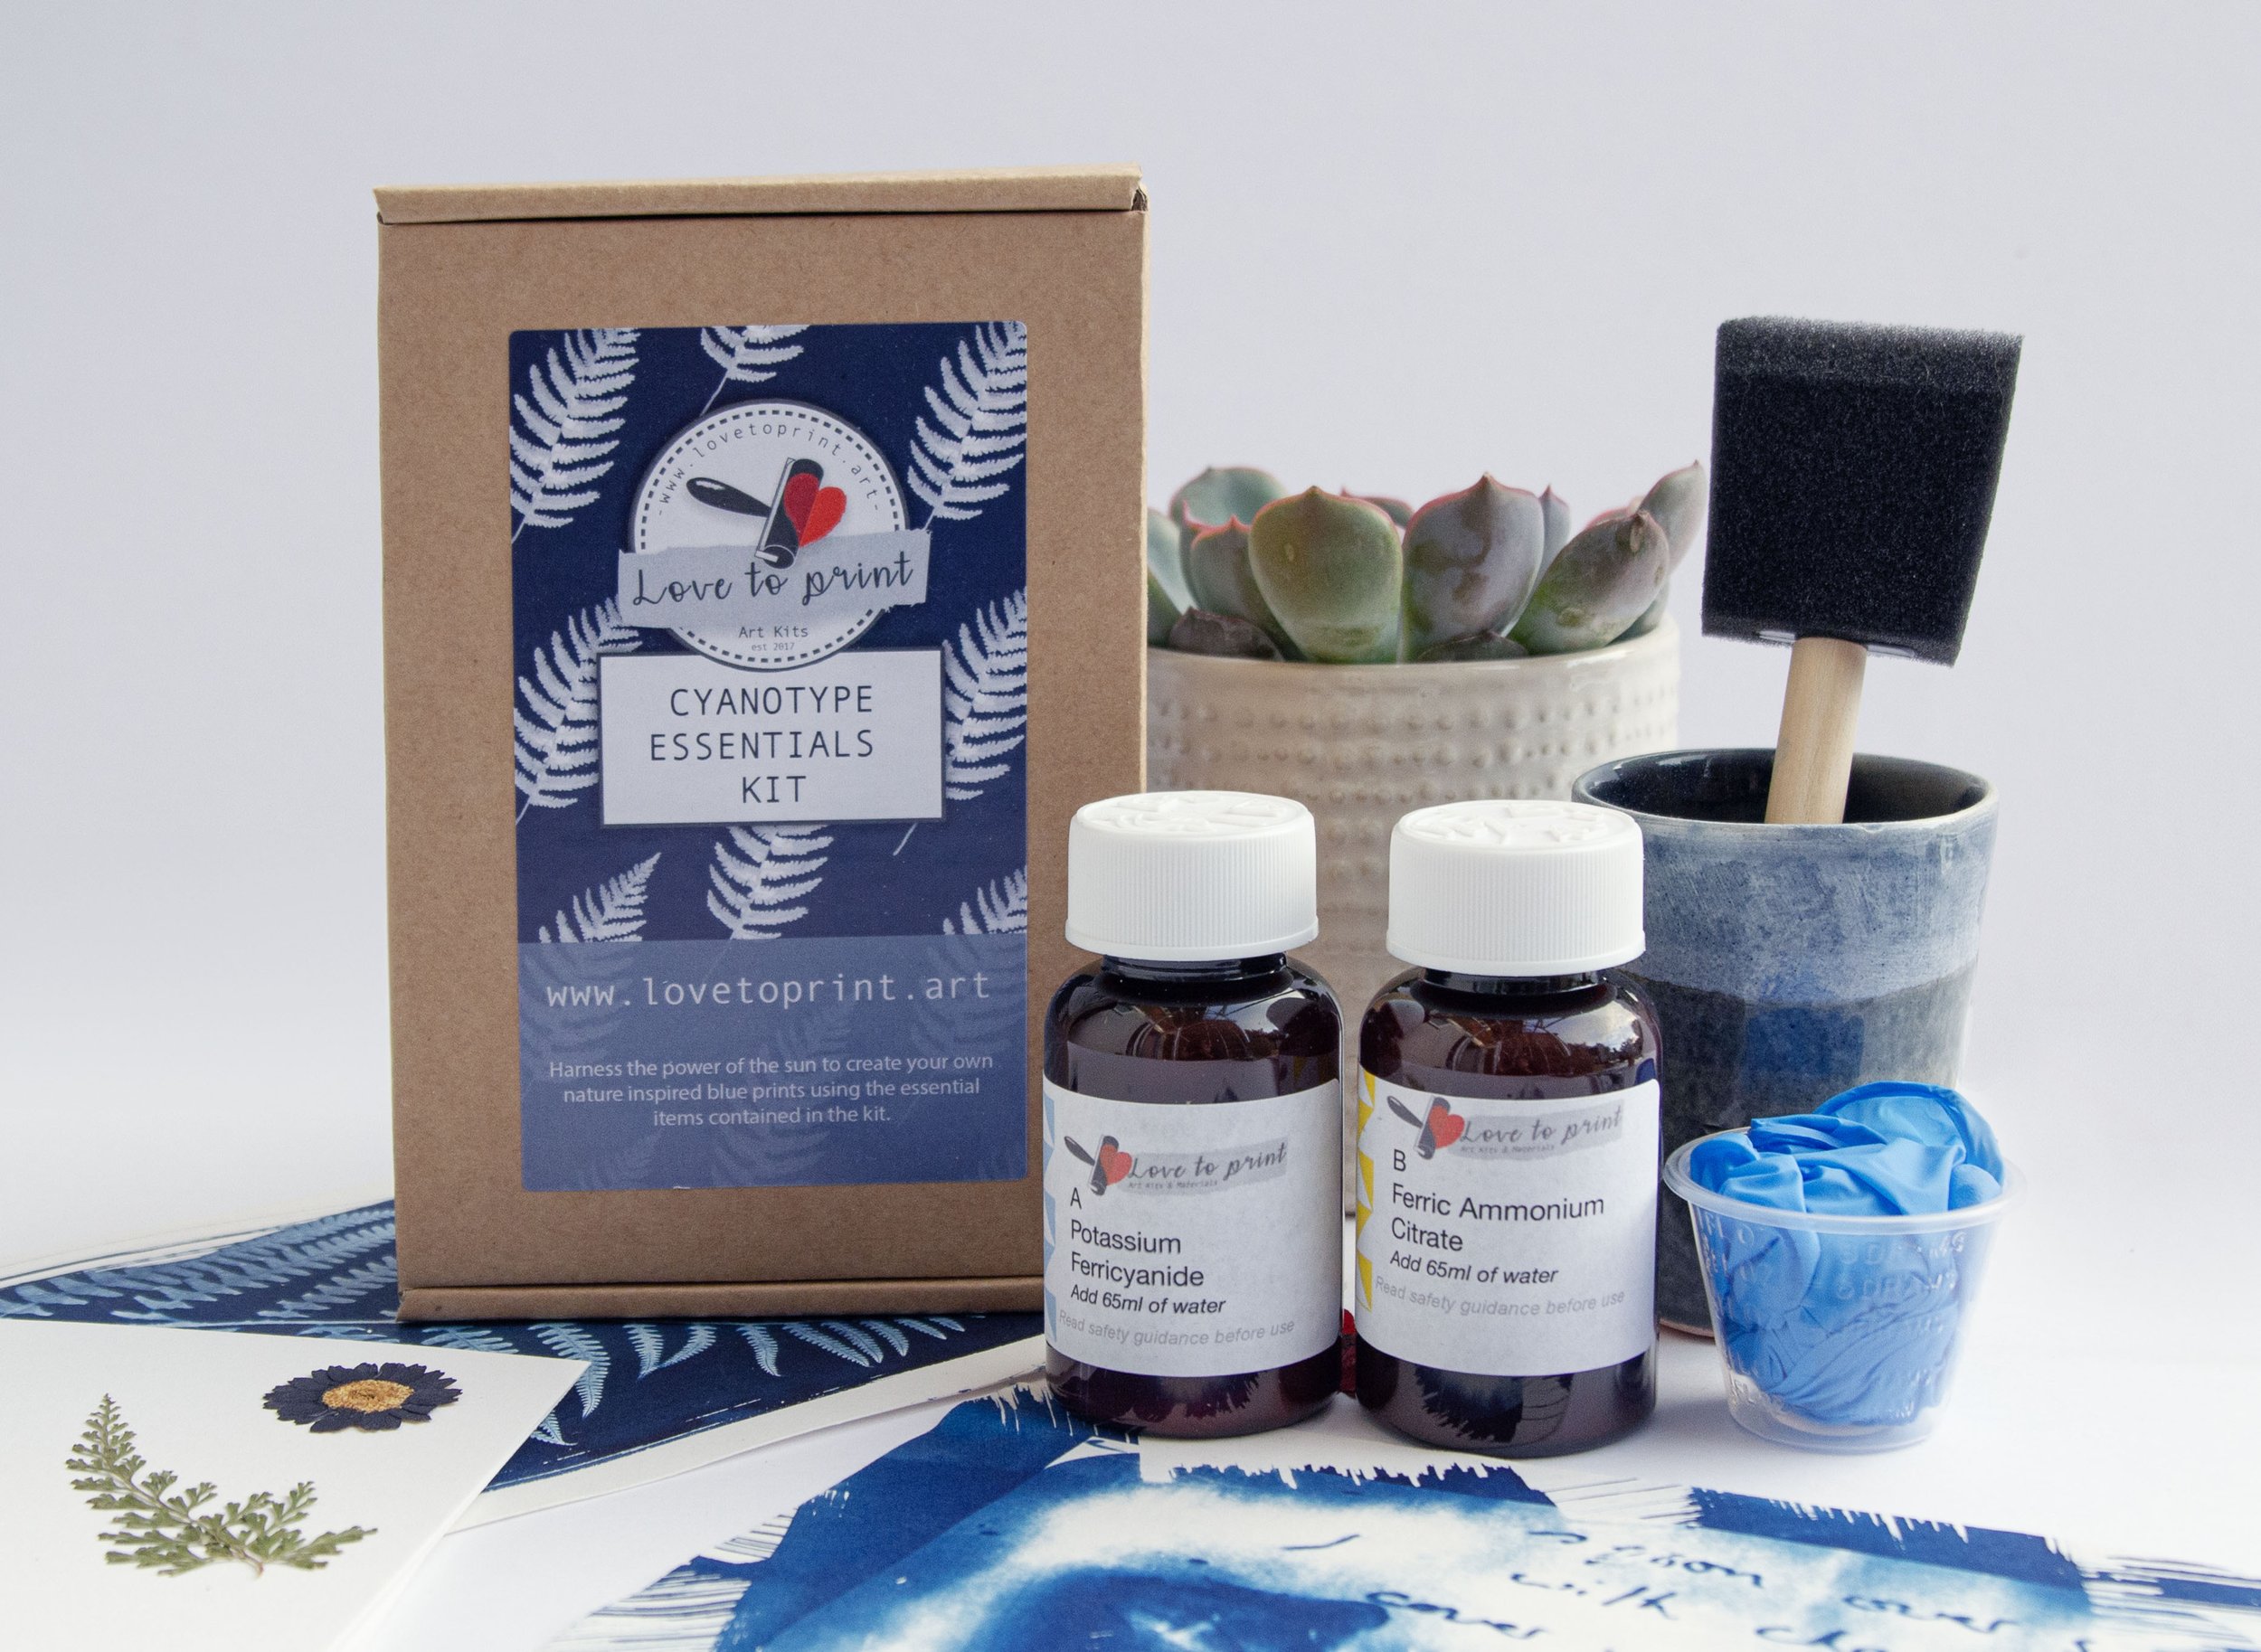
STEP 1: PREPARE THE CHEMICALS & GATHER MATERIALS
The first step in creating a cyanotype is to prepare the materials. You will need two chemicals: ferric ammonium citrate and potassium ferricyanide provided in the correct proportions in two bottles A & B in the kit in powder form. You will need to add 65ml of warm water to each bottle and shake to dissolve. Remember to wear gloves provided to avoid skin contact with chemicals and avoid staining. You will get a slightly stronger blue colour from the chemicals if you leave them for at least an hour or some people recommend 24 hours after mixing to allow a richer colour to develop however they will also work if used straight away.
Most materials are provided but you will need a sink/tray or bucket of water for the wash out stage, an apron or old clothes and newspaper or similar to protect your working area as the chemicals stain.
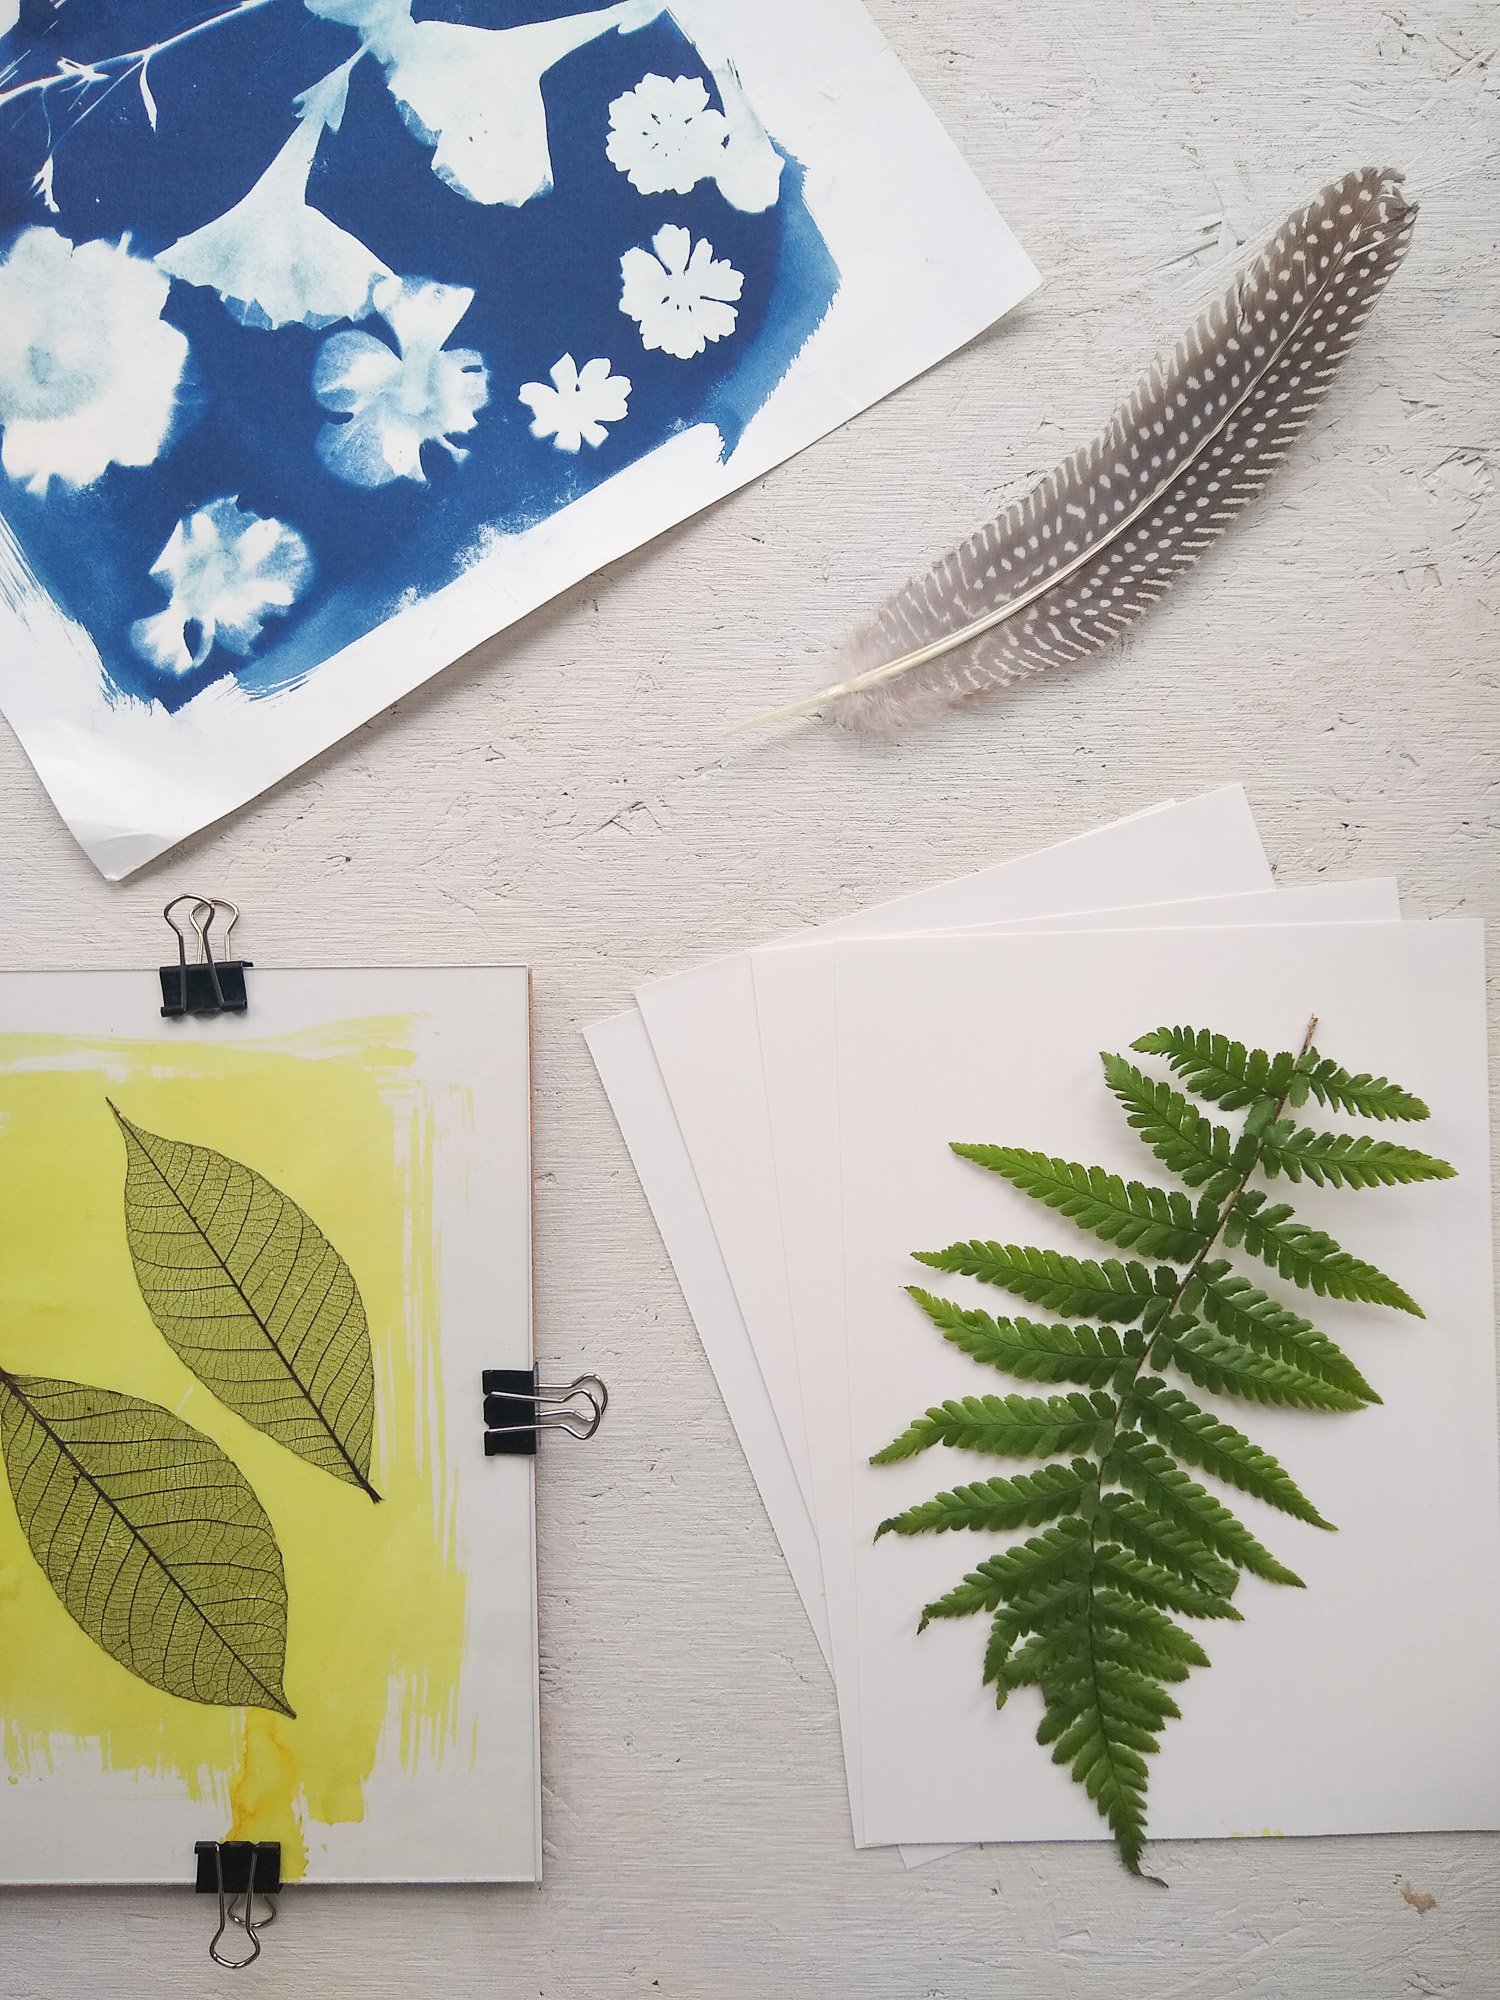
Once the paper is coated and dried you’ll need to gather materials to make the prints from this could be fresh or dried flat leaves, flowers, feathers, fabric etc or photographic negatives on acetate (digital or traditional) - a digital negative of a flower is provided for you in the kit. 3D objects can be used but are more likely to produce simple silhouettes where they come into contact with the paper. Prepare your working area - chemicals become photo sensitive once mixed so you will need to work in subdued tungsten light away from sources of daylight/UV light. This could mean working the evening and/or drawing the curtains/blinds to darken your room. It’s a good idea to have a hairdryer handy to speed up paper drying, you may want to tape the paper down in one corner with masking tape to stop it from blowing away.
Place newspaper/protective covering out on your chosen work area and some of the printing paper, it makes sense to coat several sheets at a time to give you lots to experiment with- the kit comes with 220 gsm cartridge paper which is sized for extra wet strength so can cope with soaking but many other surfaces/papers work well e.g. heavyweight art or watercolour papers and natural fabrics. There are no hard and fast rules and as the chemicals aren’t expensive trial and error is the best way to test out what works for you. You can coat up several different surfaces at the same time and wait for sunny days to test them
STEP 2: APPLY CHEMICALS TO PAPER & DRY
Next, mix the dissolved chemicals together - equal parts A & B according to the instructions on the package. Use the measuring cup and mixing pot provided or a plastic or glass jar/saucer for example which you keep for this purpose. i.e. Don’t use equipment for food use and cyanotype chemistry. A little goes a long way so 10-15ml of each chemical mixed together will coat around 6-10 pieces of A5 cartridge paper depending on how many coats you apply. Fabric will absorb more.
Once the chemicals are mixed, apply the solution to your paper or fabric using the sponge brush or a paint brush with the metal ferrule covered with tape for more pronounced brush marks. Be sure to cover the surface evenly by brushing over it several times and avoid leaving any gaps or pools of solution. Experiment with making different types of brush marks.
Leave to dry in the dark or speed up drying by blow drying on cool/low setting and place dried sheets into the black bag and then into the box or similar to protect it from light until you are ready to use.
STEP 3: EXPOSURE
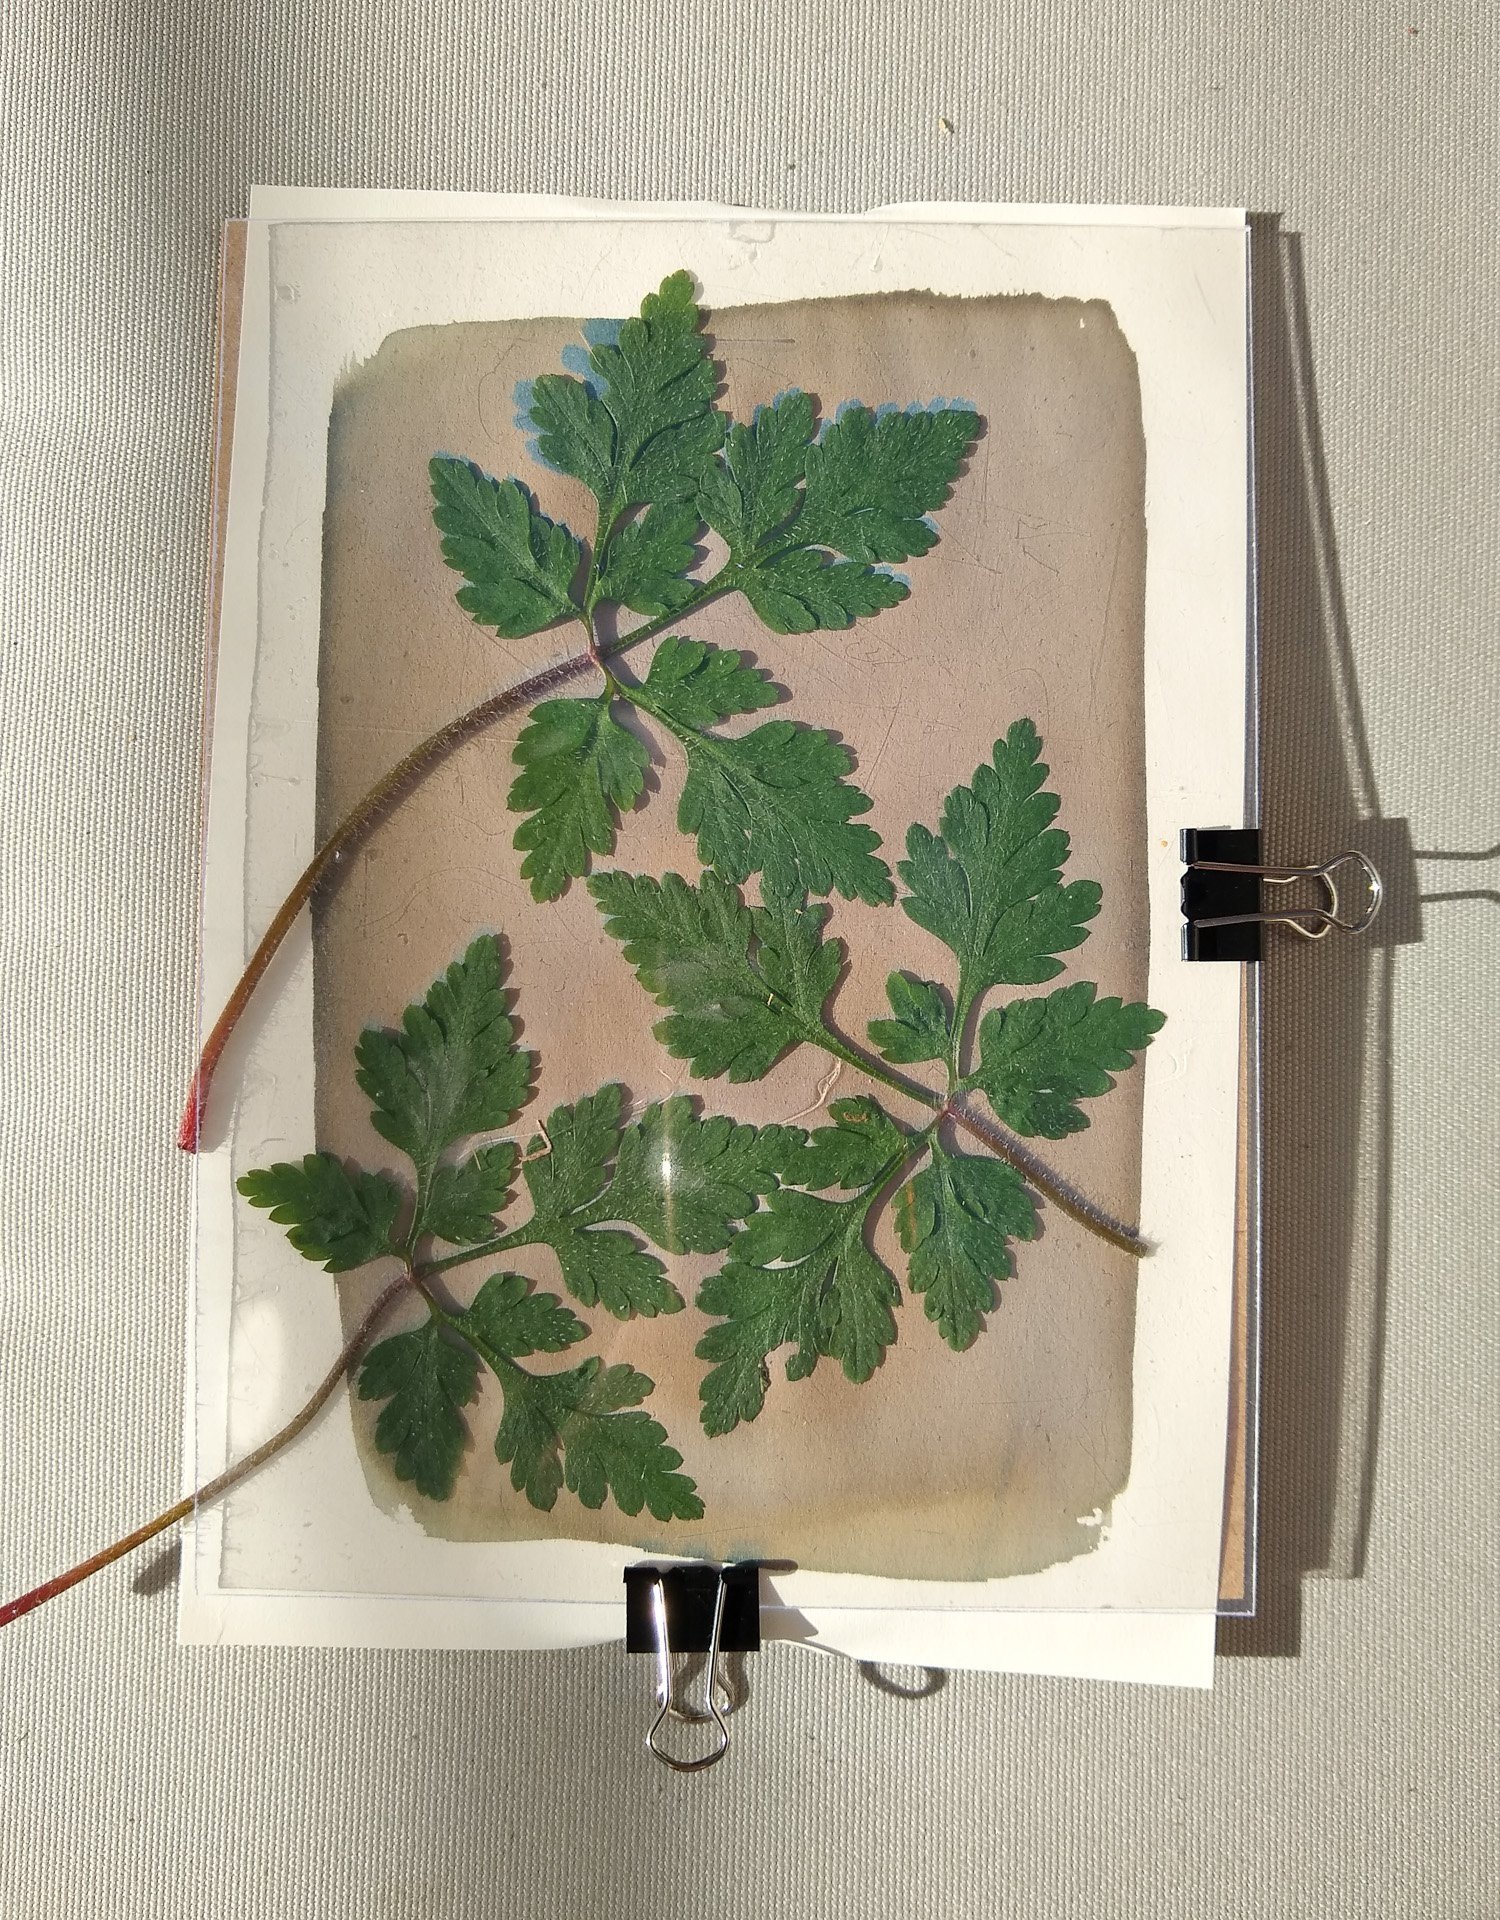
Now it's time to expose the print. Place your object (a negative or a flat object) on top of the coated paper or fabric, and place it under UV light which in most cases is outside in daylight. Using the printing frame in the kit or an old picture frame, sandwich the paper and object closely together - this will result in the clearest/sharpest images.
The UV light will cause a chemical reaction in the coated paper as it reacts to UV light, creating the blue print after washing. The exposure time will depend on the intensity of the UV light, time of day, time of year and location. On a bright summers day between 11-3 times will be fastest and can be as short as 5 minutes and under through to several hours on a cloudy winters day.
There are online calculators to suggest exposure times depending where and when you’re printing but I prefer to look at the print to judge progress.
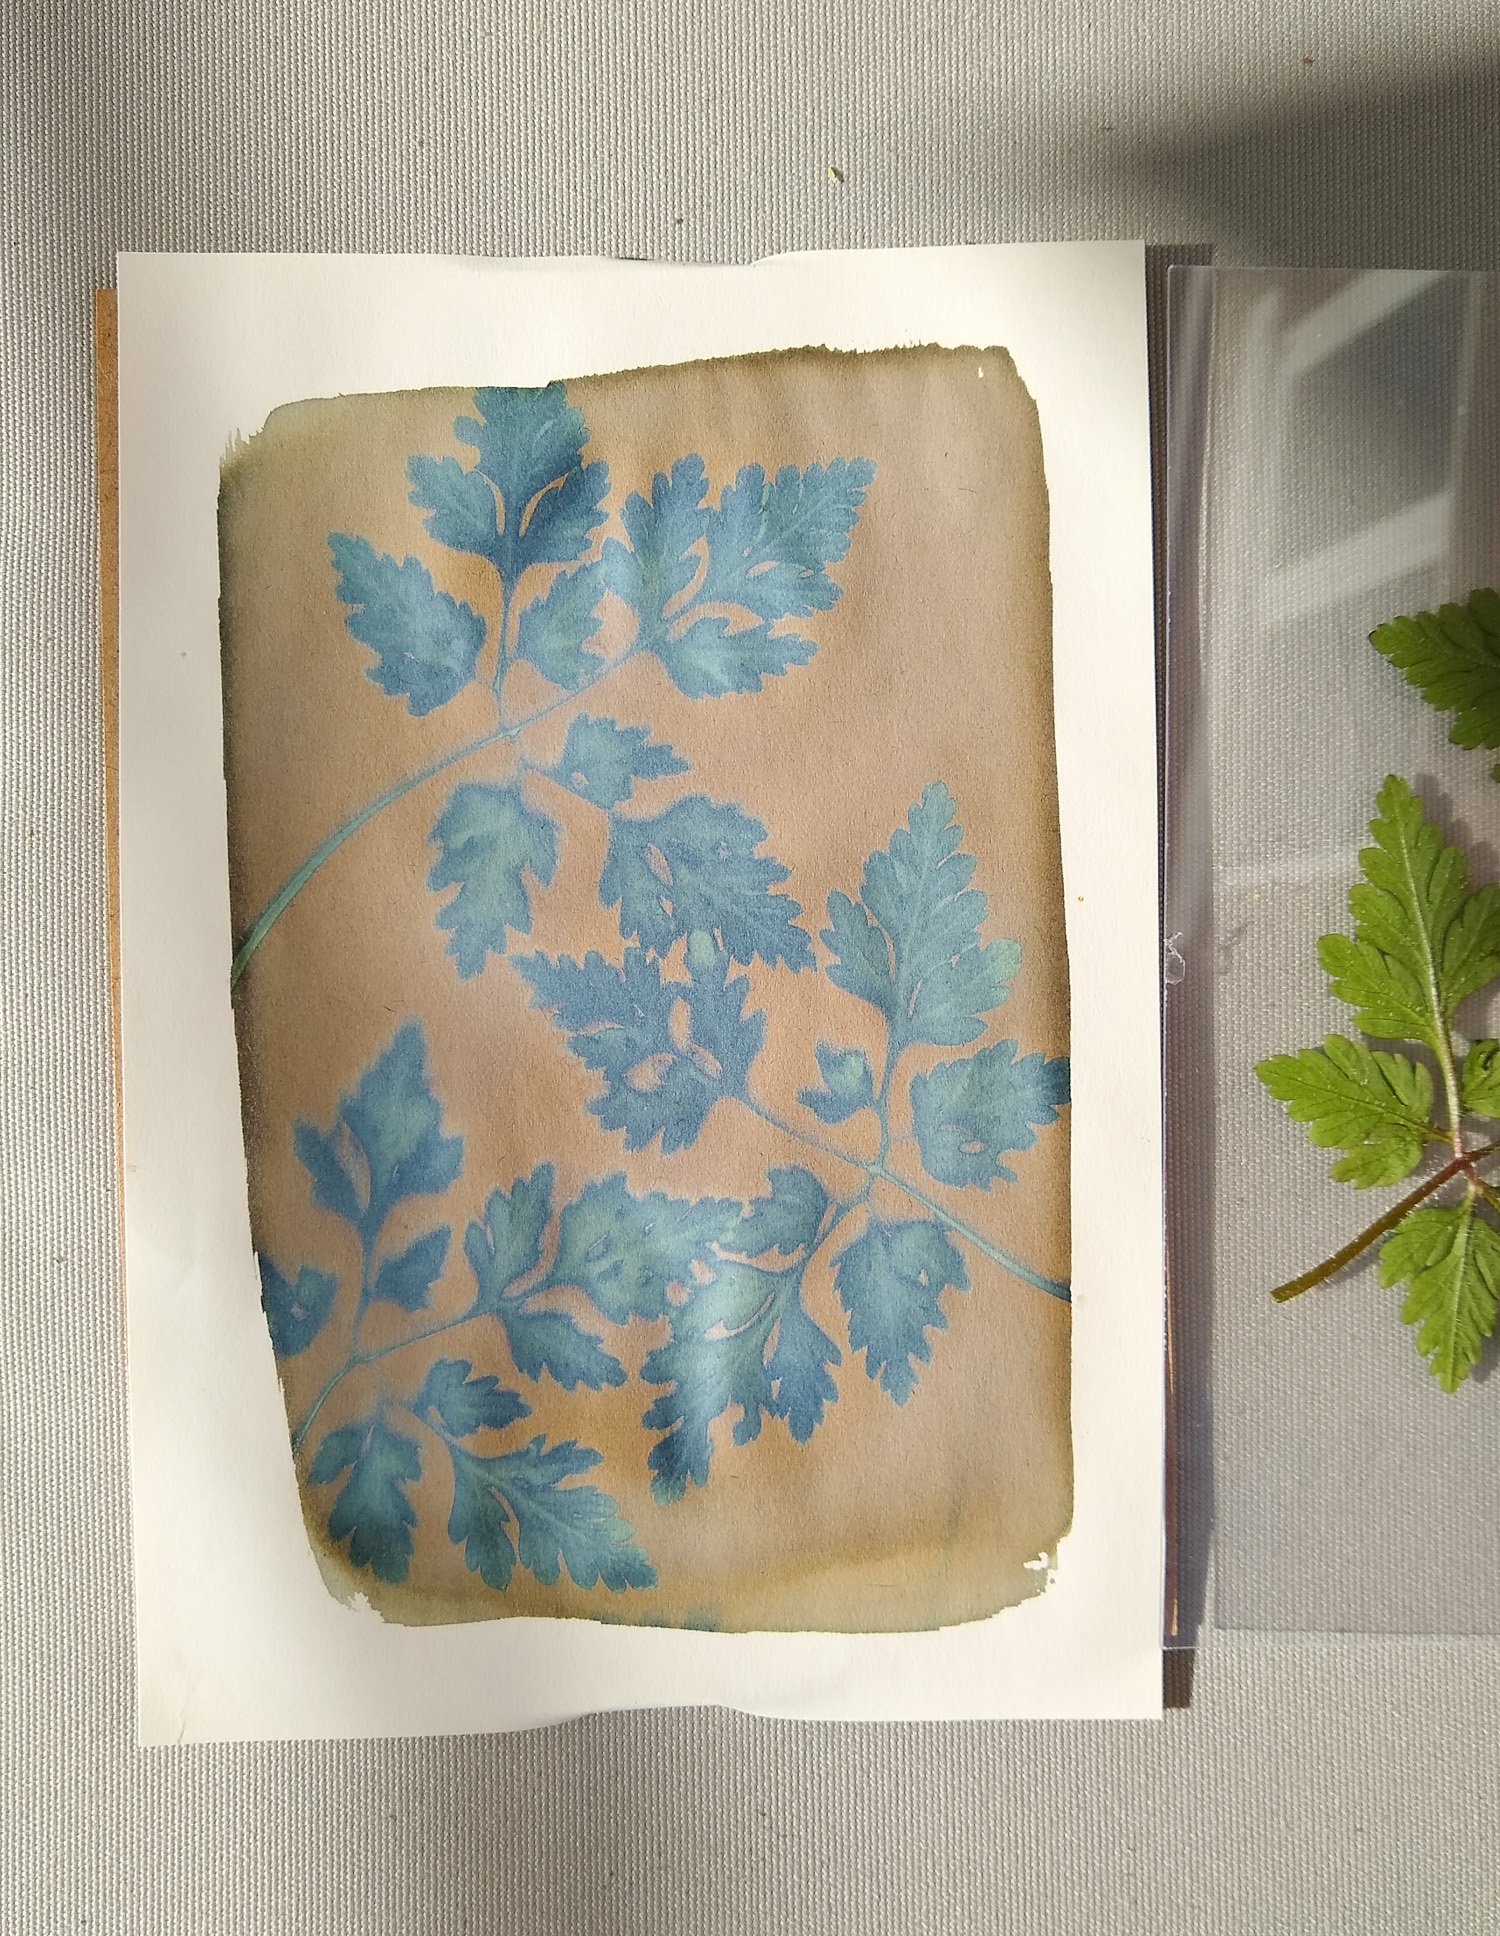
The paper starts out a bright yellow/green colour after coating and will rapidly go through several colour changes once placed outdoors
yellow - green - dark green - blue - grey
Once the print reaches the grey stage it’s fully exposed and ready to wash out. However if you rinse it out earlier when it reaches the blue stage you’re still likely to get a good print from it the blue may just be less intense. when checking areas under the objects may still appear yellow, this colour will wash out in water. If your print is blue underneath your leaves/objects this is also good and means you are likely to have detail in those areas rather than solid white silhouette.
STEP 4: WASH OUT
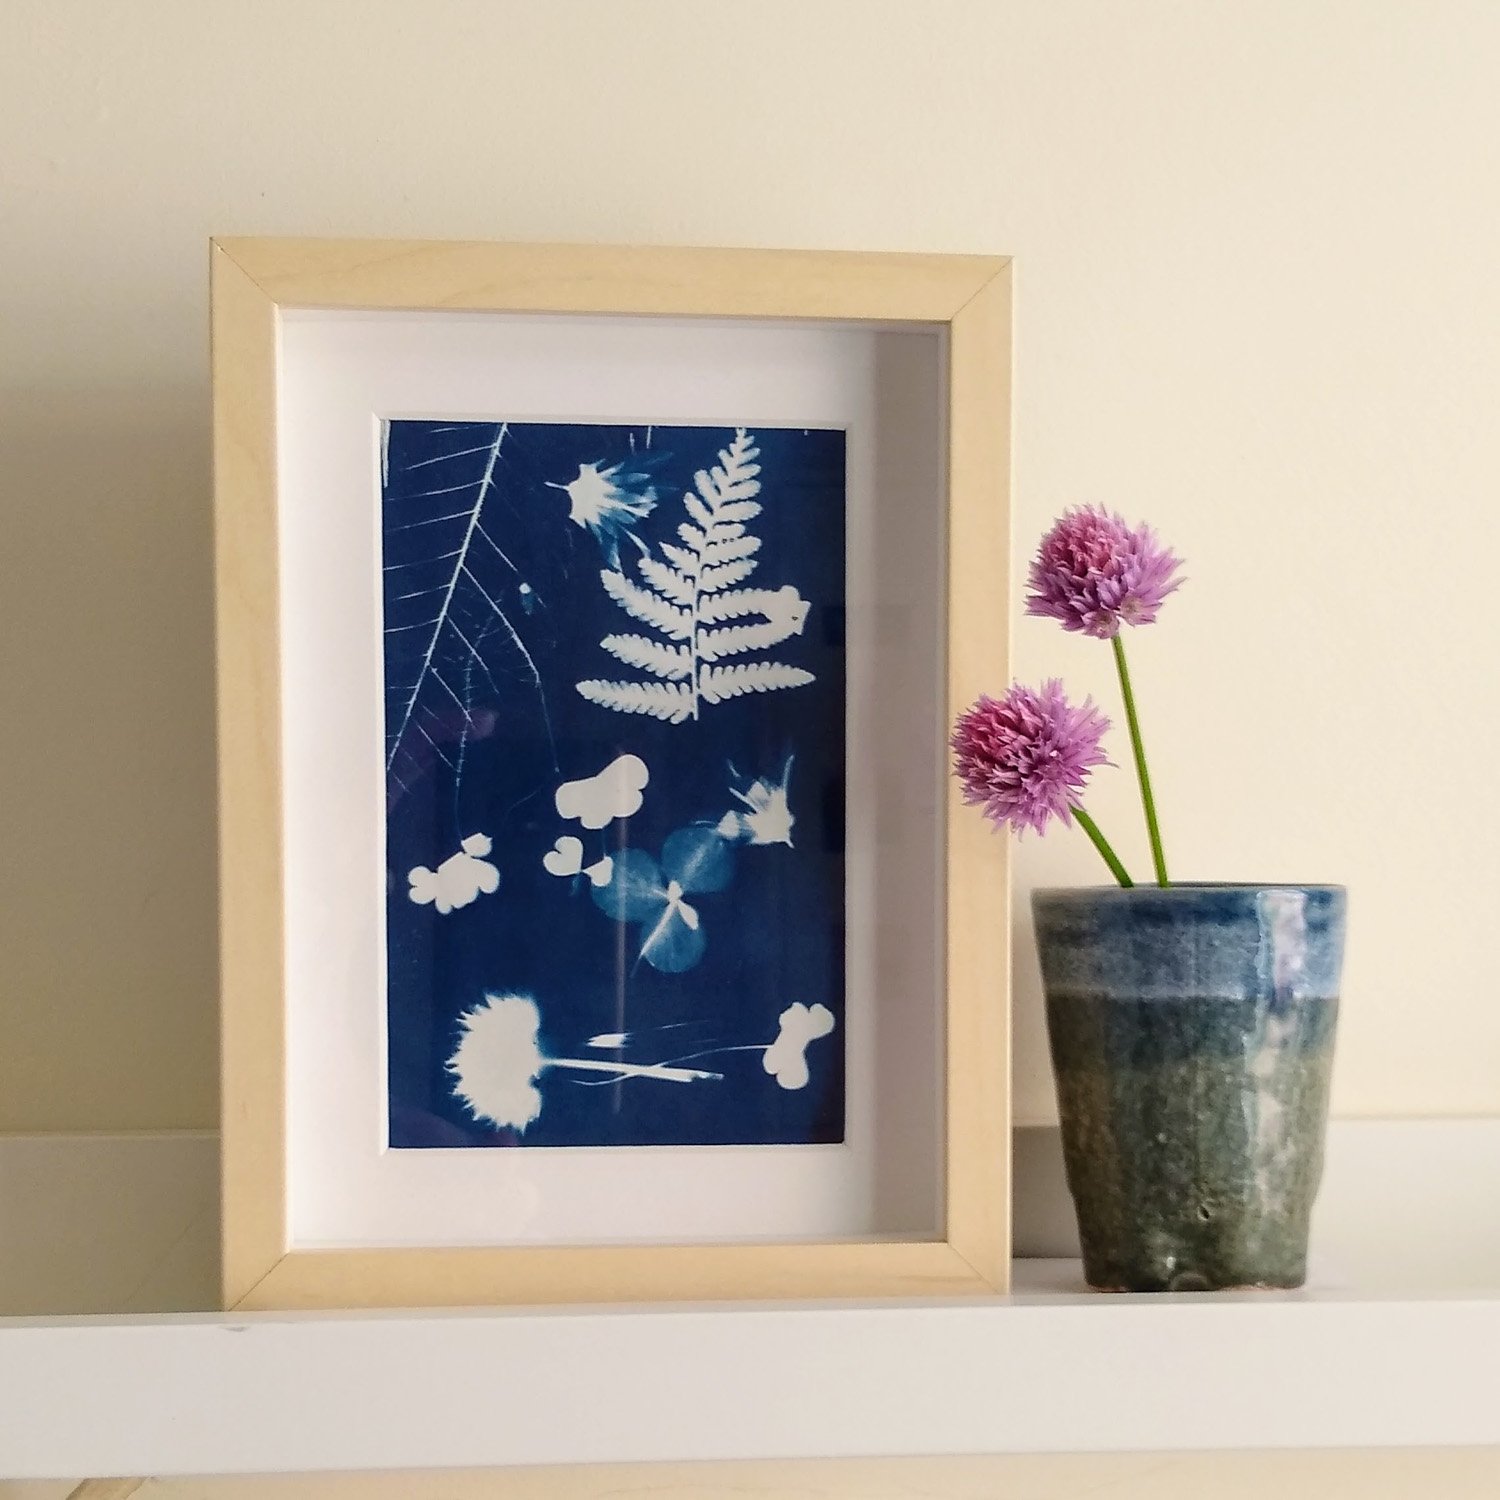
After the print has been exposed, rinse it in water to remove any excess chemicals, this shouldn’t be much longer than 5 minutes and be careful with more delicate papers. Blot the prints to remove excess water and dry ideally outdoors, if paper starts to curl it can be flattened under books overnight which usually sorts it out. The stronger prussian blue colour will develop over 24 hours as a result of oxidation. This can be speeded up by adding a capful of hydrogen peroxide liquid (available from pharmacies usually next to the hair dyes) to the wash out water which will give an instant blue reaction.
STEP 5: DRY & FLATTEN
There are a few variations on this basic process that can help you achieve different results. For example, you can use a negatives you can print yourself or have printed at a copy shop instead of an object to create a more detailed print. You can also experiment with different ratios of chemicals and different exposure times to achieve different shades of blue. You can also experiment with wet cyanotype adding for example soap bubbles and household chemicals to the paper after coating.